Our customers are enabling thousands of users to access SafePaaS self-service security and control monitoring services using SAML enabled single sign-on (SSO) from multiple devices using a single ID.
This takes just minutes to set up and makes end-user management much more efficient.
SafePaaS Identity uses the XML-based Security Assertion Markup Language (SAML) protocol for single sign-on into SafePaaS from a corporate portal or identity provider. With SAML, you can transfer user information between services, such as from SafePaaS to Microsoft 365.
Configure an Azure AD Authentication Provider
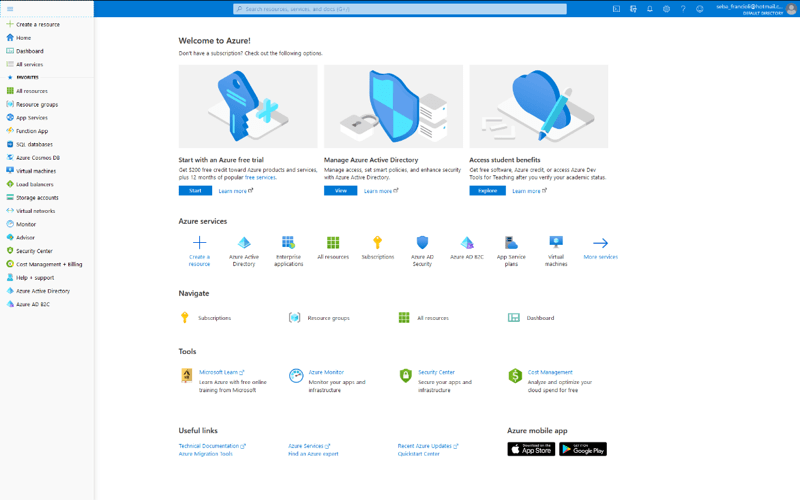
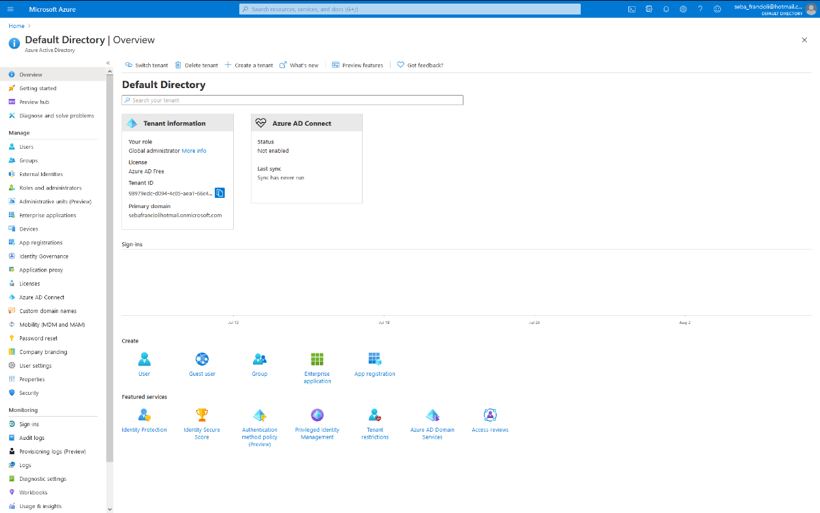
Configure Microsoft Azure Active Directory (AD) as an authentication provider to let users log in to your SafePaaS using their Azure AD credentials. The Azure application allows your users to use their Azure AD credentials to log in to a SafePaaS company. Log in to Microsoft Azure. On the left panel, select Azure Active Directory.
To register a new application, click “Enterprise applications” on the left panel and click “New application”.
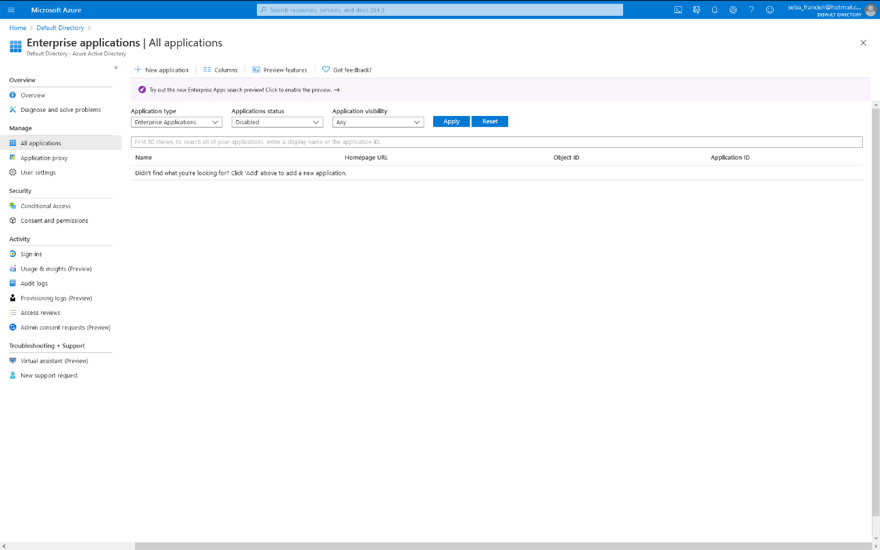
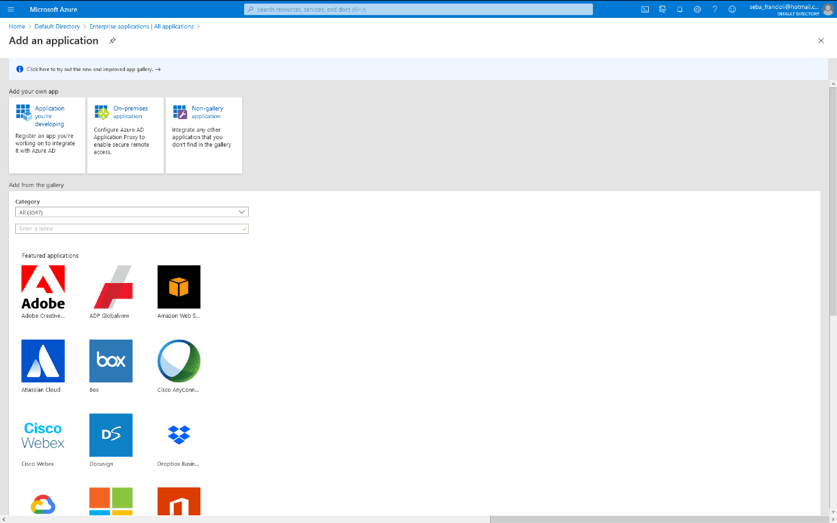
Select “Non-gallery application”.
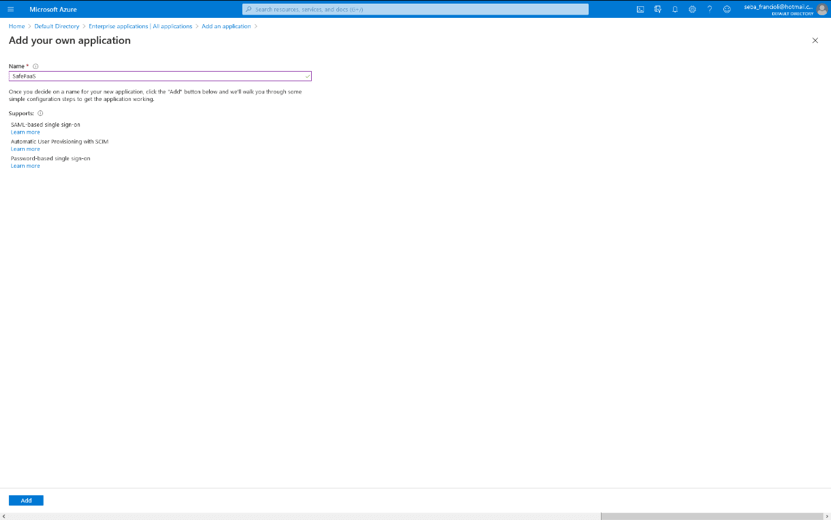
Enter an application name and click “Add”.
Assign the users that will be able to login SafePaaS clicking “Assign users and groups”.
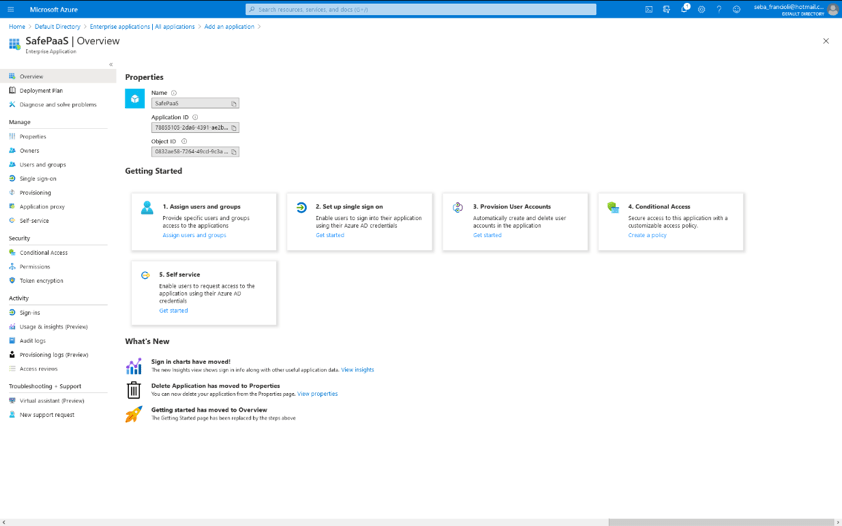
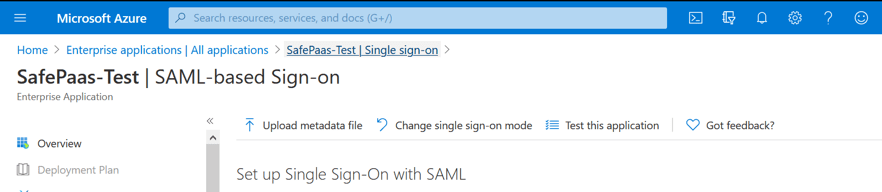
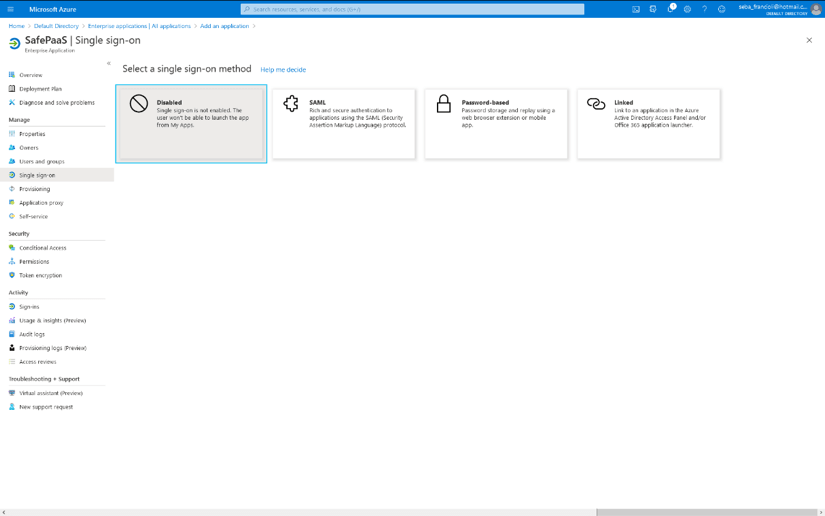
For SAML configuration, click “Set up single sign on” and click “SAML”.
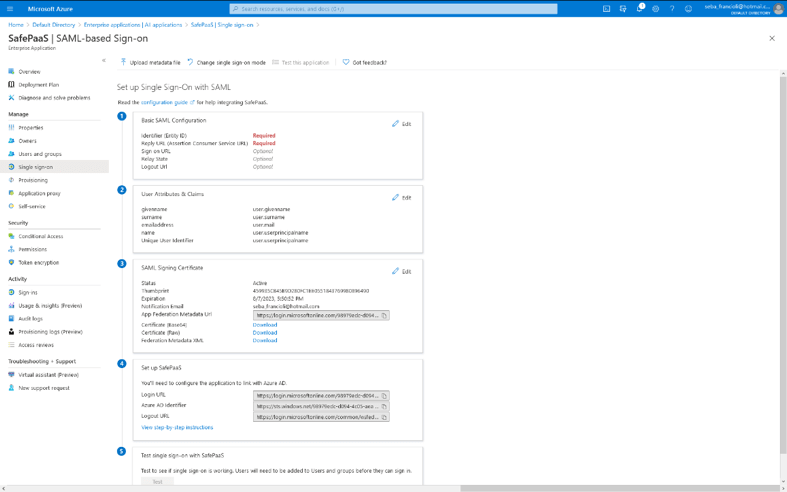
- “Identifier (Entity ID)”: https://*****.safepaas.com
- “Reply URL (Assertion Consumer Service URL)”: https://*****.safepaas.com/monitor/ferm.saml_sso
Add the “Company” attribute with the company code of SafePaaS in “User Attributes & Claims”.
Download the “Certificate (Base64)” in “SAML Signing Certificate”.
Copy the “Login URL”, “Azure AD Identifier” and the “Logout URL”.
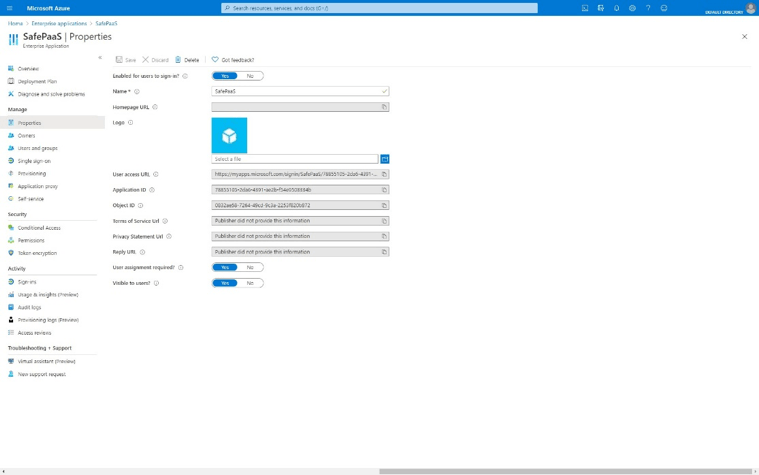
Click on “Properties” in the left panel and copy the “User access URL”.
Create an Azure Authentication Provider in SafePaaS
Setup its SAML values in SafePaaS:
Go to Administration > Company Settings > Manage Company > SAML
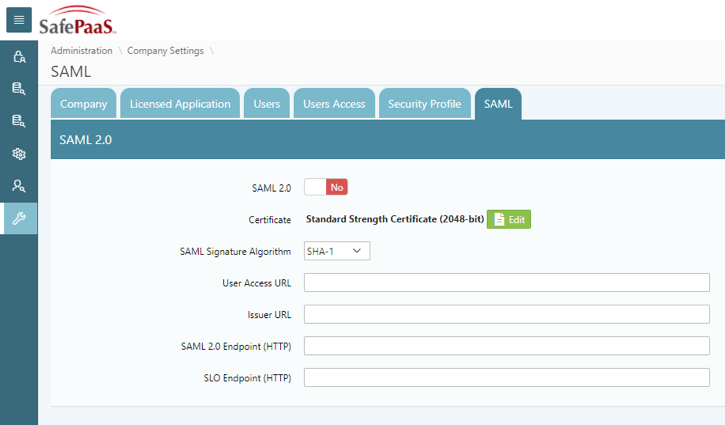
- Enable “SAML 2.0”.
- Upload the certificate that you downloaded from Azure.
- Select “SHA-256” in “SAML Signature Algorithm”.
- Fill “User Access URL” with “User Access URL” from Azure.
- Fill “Issuer URL” with “Login URL” from Azure.
- Fill “SAML 2.0 Endpoint (HTTP)” with “Azure AD Identifier” from Azure.
- Fill “SLO Endpoint (HTTP)” with “Logout URL” from Azure.
- Click “Apply Changes” button.
Test SafePaaS Connection with Azure SSO
Login to Azure Portal. Go to Enterprise applications > Search SafePaaS app > Single sign-on > Test this application.